Raised garden borders: choose your material
Not only in planting you have a choice, but also in the material for the border edge. Depending on your garden design, the amount of work you want to put into it and the money you want to spend, you can choose from a large range of options. A look at this Pinterest page will get your ideas. Here we look at 5 popular border edges and give tips for the construction.
Preparation
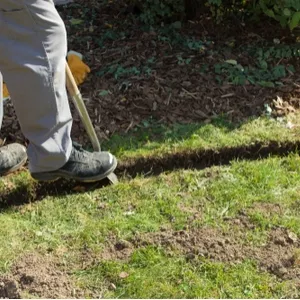
Whatever border edge you choose, there is always preparatory work.
To get a sleek finish, stake out the edge with picket posts, between which you attach a masonry cord or another thin rope.
You then dig a groove along this marking for the border elements or the foundation.
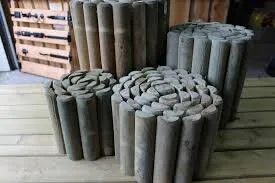
1. Border roll
Tools:
- Spade
- Picket posts
- Masonry cord
- Spirit Level
- Rubber hammer
A border roll consists of wooden posts, which are connected with iron wire. You have the choice between hardwood and impregnated wood. Hardwood will rot less quickly but is also considerably more expensive. For a border edge with border rolls, you dig a trench of about 10 cm deep. Place a roll in the trench and tap the posts one by one a little further into the ground with a hammer. Hold a block of wood on top of the posts to prevent damage. Check with a spirit level if the edge has the same height everywhere and fill the trench with soil.
Tip: Buy border rolls that are provided with anti-wash cloth on the back. This prevents the garden soil from flushing away between the posts.
2. Terrace tiles
Tools:
- Spade
- Picket posts
- Masonry cord
- Spirit Level
- Rubber hammer
For those who want to finish the job quickly: terrace tiles set on their side form a simple but effective border edge. Dig a trench along the tensioned masonry cord that is as deep as half of the tiles. Put the tiles in here, fill in the trench with soil and, if necessary, tap with the hammer to level the top.
3. Stacking blocks
Tools:
- Spade
- Picket posts
- Masonry cord
- Spirit Level
- Angle grinder
- Glue sprayer or trowel
A border edge of stacking blocks has a sleek look that works well in modern garden design. In addition to the blocks, you need kerbstones of 5x15x100cm and glue.
Dig a trench 10 centimeters deep to lay the foundation of kerbstones. Check if they are level. Use polymer sealant, PU spray glue or prepare stone glue powder to glue the stacking blocks. Apply the first layer of stacking blocks to the foundation, and glue on the following layers staggered to get a solid construction. Where it is necessary to cut blocks to size, you can use an angle grinder with a diamond blade.
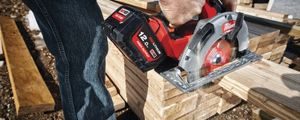
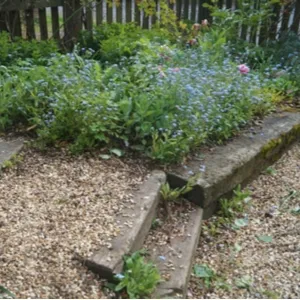
4. Sleepers
Tools:
- Chainsaw
The time when railway sleepers were extremely popular in the garden is a bit over, but they still make a beautiful and strong border edge. The advantage is that you can lay them without foundation.
You do need a lot of cutting power through – or a powerful saw – to get them customized, and they are only suitable for straightforward borders.
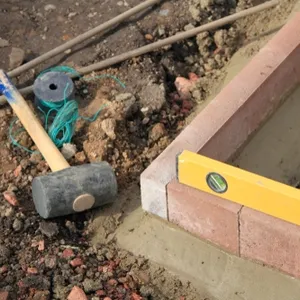
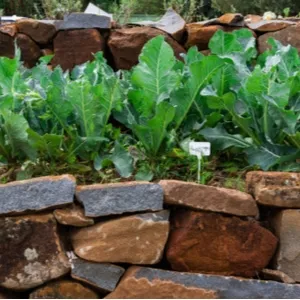
5. Brick or natural stone
Tools:
- Spade
- Picket posts
- Masonry cord
- Spirit Level
- Optionally: trowel
Stone walls, preferably a bit old and weathered, belong in a romantic garden. You can stack or cement the bricks. In both cases, you provide a foundation by digging a trench of at least 10 cm depth and filling it with sand or cement. The latter is definitely recommended if you want to go higher than three layers. In that case, it is better to cement the stones than to just stack them.
And now…
When the border edge is finished, the real work begins for garden lovers: filling this new garden section. An advantage of a raised border is that you can fill it with the type of soil in which your preferred plants thrive. Rich, fertilized garden soil, sandy soil for faster water drainage, garden peat for plants that love acidic soil … At the garden center, they can better advise you on this subject than we can. But we do have a few green tips for your new border:
- Does the border get a lot of sun, or is it mainly in the shade? Keep this in mind when choosing the plants, because there are typical shade plants and species that thrive in full sun.
- In a classic border, you arrange the plants according to their height: the little ones at the front and the tall growers at the back.
- A raised border will dry out earlier in the summer than the rest of the garden. The smaller plants along the edge, in particular, require an extra watering every now and then.
- And in the winter, a raised border is more susceptible to frost because the soil cools faster. So be sure to protect the border plants when frost is predicted.