In every home, things eventually break down, and parts need replacing. This also applies to electrical sockets. Often, after many years, a socket may become faulty and will need to be replaced, which is also crucial for safety reasons. In this article, you will learn how to replace a socket yourself in a few simple steps.
Switch off the electricity

Before you start any work, it is essential to ensure that no electricity is connected to the socket you wish to replace. To do this, you can switch off the power group in the meter cupboard connected to the concerned socket. If you are not sure which group to switch off, it is advisable to err on the side of caution and switch off the power for the entire house. Safety in your work is always important, and this is especially true for work that involves electricity. To make sure there is no voltage left on a socket, you can use a voltage detector.
Remove the cap from the socket

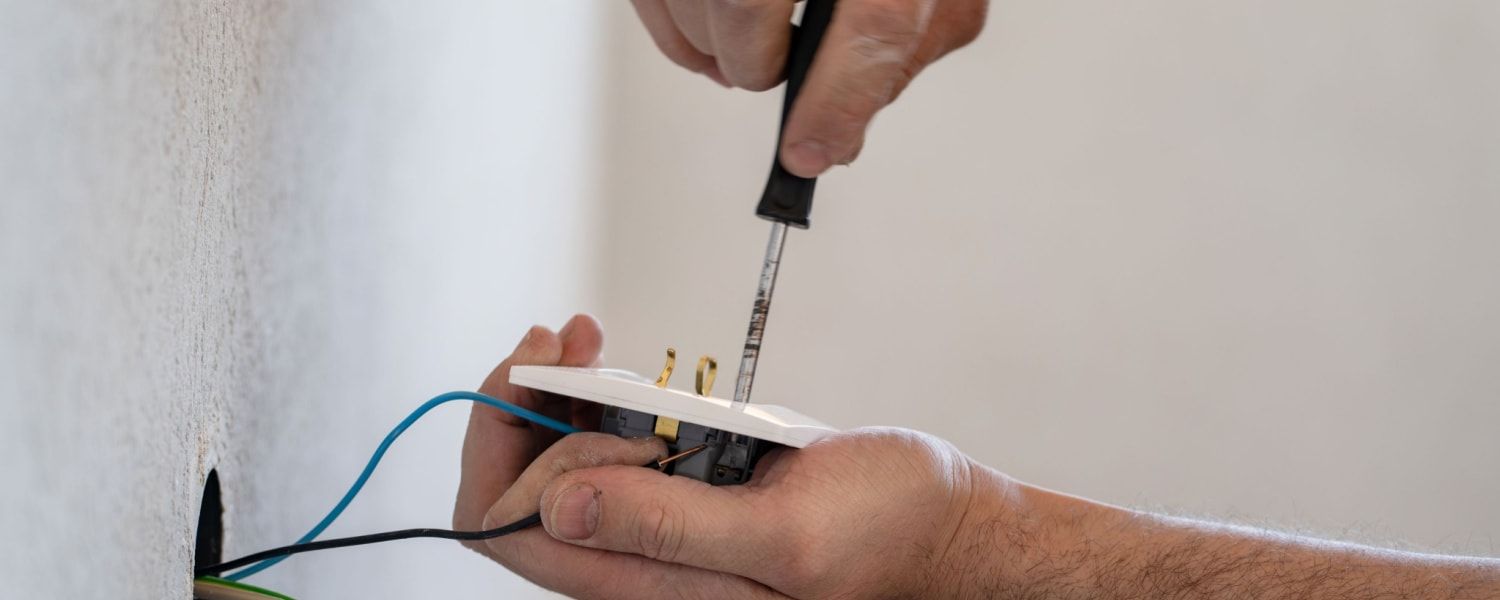
Removing the cap from a socket is usually easy with a screwdriver. In most cases, the screws are visible to the naked eye, but modern sockets sometimes have a cap over them. You can then simply snap off this cap. With a screwdriver, you can easily remove the cap from a socket by unscrewing the screw and removing it.
The contacts are now exposed, and you can unscrew the socket’s mounting screws as well. With this, you can remove the socket from the wall to replace it.
Replace the socket

To replace the socket, you need to unscrew the lead wires from the existing socket to connect it to a new one. Once the lead wires are unscrewed, it is important to pay attention to the colours. The earth wire is green/yellow, and the neutral wire is blue. Under no circumstances should these wires come into contact with each other. Besides the earth wire and the neutral wire, there is also a phase wire, which is brown.
Take the new socket and mount the phase wire and the neutral wire in the contacts. Connect the earth wire to the screw for earthing. Use a stripper if you notice that the ends of the wires are deformed when replacing the socket. With a stripper, remove the piece of sheathing from the wire to re-create nice ends for attaching to the socket and the screw for earthing.
After attaching lead wires to the new socket, you can mount the new socket back to the wall. You do this simply by screwing the fixing screws back into the wall.